Cutting chicken breast can seem like a daunting task, especially if you’re not sure how to do it safely and evenly. I created this post because I know how frustrating it can be to end up with uneven pieces that cook at different rates. There’s nothing worse than a perfectly seasoned chicken breast, only to find some parts are dried out while others are still raw. That’s why I want to share the right techniques to help you tackle this kitchen challenge with confidence.
If you’re someone who enjoys cooking, whether you’re a beginner or someone with a bit more experience, this post is for you. You likely care about serving delicious meals that look as good as they taste. Cutting chicken breast the right way can elevate your dishes, making them not only tastier but also visually appealing. Plus, understanding how to handle raw meat safely is key to keeping your kitchen a healthy space.
In this guide, you’ll discover practical tips and techniques that will make cutting chicken breast simple and safe. I’ll walk you through everything from choosing the right knife to understanding the anatomy of the chicken breast. You’ll learn how to slice through with precision, ensuring even cooking every time. By the end of this post, you’ll feel equipped to handle chicken like a pro, bringing more confidence to your cooking routine. Let’s get started!
1. Choosing the Right Knife

Choosing the Right Knife is essential for cutting chicken breast safely and evenly. A good knife can transform your cooking experience. A chef’s knife, with its broad blade, is perfect for most tasks. It balances well in your hand, making it easier to slice through meat. On the other hand, a boning knife excels at precision cuts, especially around bones and joints.
When selecting a knife, feel the grip. It should fit comfortably in your hand, allowing you to maneuver effortlessly. A sharp knife is your best friend in the kitchen. It helps you make clean cuts, and reduces the chance of accidents. Dull knives can slip and lead to injuries, so keep your tools well-maintained.
To master your chicken cutting skills, consider these tips:
• Choose a chef’s knife or boning knife for versatility
• Keep your knife sharp for safe and smooth cuts
• Maintain a firm grip while slicing to avoid slips
• Always practice knife safety to protect yourself and others
With the right knife and techniques, you’ll be cutting chicken breast like a pro in no time! Enjoy the process, and remember, practice makes perfect. Happy cooking!
Choosing the right knife is half the battle in how to cut chicken breast safely and evenly. A chef’s knife gives you control for most tasks, while a boning knife shines for precise cuts around bones. Pick a grip that fits your hand, and practice with confidence.
2. Thawing Chicken Safely

Thawing chicken safely is your first step toward perfectly cut chicken breast. It’s not just about convenience; it’s about keeping your meal safe. Always thaw your chicken in the refrigerator overnight. This method keeps your chicken at a safe temperature, preventing harmful bacteria from growing. If you’re short on time, you can also use cold water or the microwave. Just remember, never leave your chicken out at room temperature. It might seem easier, but that can lead to foodborne illnesses.
Once your chicken is thawed, take a moment to pat it dry with paper towels. This small step gives you a better grip when slicing. It also reduces mess, making your prep cleaner and easier. Here’s a quick guide on how to thaw chicken safely:
– Thaw in the fridge: Plan ahead and let it sit overnight for best results.
– Use cold water: Place the chicken in a sealed bag, submerge it in cold water, and change the water every 30 minutes.
– Microwave: If you’re in a rush, use the defrost setting, but cook immediately after.
– Pat dry: Use paper towels to remove excess moisture before cutting.
Following these steps will not only keep your chicken safe but make it much easier to slice evenly. With these tips, you’ll be ready to tackle your chicken breast with confidence!
3. Sanitizing Your Work Surface

Keeping your work surface clean is essential when you’re preparing chicken. A clean area helps prevent any harmful bacteria from spreading. Start by washing your cutting board and countertops with hot, soapy water both before and after you cut the meat. This simple step can make a big difference in keeping your kitchen safe.
To take it a step further, consider using a dedicated cutting board just for chicken. Using a board made of non-porous materials like plastic makes cleaning a breeze. Plus, it keeps your other foods safe from cross-contamination. You’ll feel more confident knowing that you’re doing everything you can to keep your meals healthy.
Here are some practical tips to help you maintain a clean workspace while prepping chicken:
Wash your hands before and after handling chicken to keep germs at bay.
Clean surfaces with hot, soapy water for a thorough disinfect.
Use separate boards for meats and vegetables to avoid cross-contamination.
Choose non-porous cutting boards for easier cleaning and better hygiene.
By following these steps, you create a safe cooking environment that makes preparing chicken a lot easier. You’ll feel good knowing your meals are not just delicious but also safe to eat. So roll up your sleeves and get started on that tasty chicken dish!
4. Understanding the Anatomy of Chicken Breast

Understanding the anatomy of chicken breast is key to making perfect cuts every time. The chicken breast is made up of two main sections: the tenderloin and the main breast. Each of these parts has its own qualities and cooking times, which can help you create delicious meals with ease.
The tenderloin is the smaller, more delicate piece that cooks faster. When you slice it separately, you can control the cooking process better, ensuring it stays juicy and flavorful. This knowledge will boost your meal prep skills and impress your family or guests.
Here are some practical tips to make the most of your chicken breast cutting:
• Identify parts: Learn to spot the tenderloin and main breast easily.
• Cut across the grain: This method enhances tenderness in each bite.
• Choose cooking methods: Plan your cooking based on which part you’re using.
• Separate tenderloins: This allows for quicker cooking and better results.
With these tips, you’ll not only improve your cutting skills but also elevate your cooking game. Imagine serving perfectly cooked chicken that’s tender and full of flavor. Happy cooking!
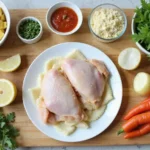
5. Preparing the Chicken Breast

Preparing your chicken breast correctly can make a big difference in your cooking experience. First, take a moment to trim away any excess fat or sinew. This not only helps improve the texture of your chicken but also makes it cook more evenly.
Next, rinse the chicken breast gently under cold water. After that, pat it dry with paper towels. This step is crucial because it prevents the chicken from slipping while you cut. A dry surface makes for safer and cleaner cuts.
Make sure your cutting area is clean and dry, too. A tidy workspace reduces the risk of contamination, keeping your meal safe and delicious. Proper preparation sets the stage for perfect cuts, leading to a better cooking and eating experience.
Here are some handy tips to keep in mind:
Trim excess fat and sinew for better texture.
Rinse under cold water to keep it fresh.
Pat dry with paper towels to avoid slipping.
Keep your area clean to prevent any contamination.
Taking these steps seriously will not only enhance your cooking but also make the process more enjoyable. Enjoy your cooking adventure with perfectly prepared chicken!
6. Slicing Against the Grain

Slicing chicken breast against the grain is your secret to creating tender, juicy pieces that are easy to chew. The “grain” describes the direction of the muscle fibers in the meat. By cutting against these fibers, you shorten them, which leads to a more enjoyable eating experience. To spot the grain, look for the striations or lines running through the chicken. Trust me, cutting perpendicular to the grain will give you the best results.
To master this technique, start by observing the chicken breast before you slice. Notice how the fibers run. When it’s time to cut, position your knife at a 90-degree angle to those fibers. If you practice this, you’ll quickly become skilled at identifying the grain. You’ll be amazed at how much difference it makes in texture.
Here’s how to slice chicken breast against the grain like a pro:
1. Identify the grain by looking for striations.
2. Use a sharp knife for clean cuts.
3. Cut at a 90-degree angle to the grain.
4. Keep your slices even for uniform cooking.
With these tips, your chicken will be tender and flavorful every time. Enjoy impressing your friends and family with perfectly sliced chicken breast at your next meal!
7. Perfectly Even Slices

When it comes to cutting chicken breast, achieving perfectly even slices is key for cooking them evenly. You want each piece to cook at the same rate, ensuring that none are overdone or undercooked. Start by selecting a sharp knife; this makes the job easier. Hold the chicken breast steady on a cutting board, and begin slicing from one end to the other.
Aim for a thickness of about half an inch. This size helps the chicken cook quickly and evenly. If you’re unsure about thickness, use a ruler or the width of your finger as a guide. Remember, practice makes perfect, so don’t worry if your slices aren’t perfect at first.
To get the hang of it, take your time. A steady hand goes a long way. You can even try cutting with a slight sawing motion to help the knife glide through the meat. This technique not only helps with evenness but also keeps the juices locked inside each piece.
Here are some handy tips to keep in mind:
• Use a sharp knife for clean cuts.
• Choose a sturdy cutting board for stability.
• Measure thickness with your finger for accuracy.
• Practice often to improve your technique.
With these tips, you’ll be able to cut chicken breast like a pro, making meal prep faster and more enjoyable. Plus, it ensures your dishes turn out delicious every time!
8. Butterfly Technique for Even Cooking

When you want your chicken breast to cook evenly and quickly, the butterfly technique is your best friend. This method not only speeds up cooking time but also helps the chicken absorb flavors better, making your meal more delicious. Imagine opening the chicken breast like a book; this simple move increases its surface area, allowing for even cooking. This technique works wonders whether you’re grilling, baking, or pan-searing.
Let’s break it down step by step. First, place the chicken breast on a sturdy cutting board. Make sure it’s stable to prevent any accidents. Using a sharp knife, slice horizontally through the thickest part of the breast, but don’t cut all the way through. Leave a small hinge on one side. Now, open the breast like a book. Voilà! You’ve just created a butterfly chicken breast.
This method is perfect for those busy weeknights when you want a quick meal without sacrificing flavor. Plus, it’s an excellent way to marinate your chicken, as the increased surface area allows the marinade to soak in deeply.
Here are some quick tips to get you started:
Place the chicken breast on a stable cutting board for safety.
Slice horizontally, ensuring to leave a hinge for easy opening.
Open the breast like a book to maximize surface area.
Ideal for grilling and marinating to enhance flavors.
Now you’re all set to impress your family and friends with perfectly cooked chicken every time!
9. The Impact of Thickness on Cooking Time

Cooking chicken breast to perfection means understanding how thickness affects cooking time. If your chicken is too thick, the outside may cook too fast while the inside stays raw. Conversely, thin slices cook quickly but can dry out easily. To solve this problem, aim for uniform thickness. This way, every piece cooks evenly, giving you juicy, tender chicken every time.
One effective method is using a meat mallet. Gently pound the chicken breast to an even thickness. Not only does this help with cooking time, but it also tenderizes the meat. Tender chicken means more flavor and a better texture in your dishes.
Here are some tips to get it right:
Pound the chicken to an even thickness for consistent cooking.
Check the thickness with a ruler to ensure uniformity.
Cook thinner pieces for shorter times to prevent drying out.
Monitor the internal temperature with a meat thermometer for safety.
By following these steps, you can make your meal prep easier and more delicious. Perfectly cooked chicken breast is just a few simple techniques away!
10. Cutting Chicken Strips for Stir-Fries

Cutting chicken strips for your stir-fries is a key step to delicious meals. You want to start with a fresh chicken breast. Slice it into evenly sized slabs, making sure they’re about half an inch thick. This size is perfect; it cooks quickly and stays juicy, blending beautifully with any vegetables you throw in.
To elevate the taste, consider marinating your strips for at least 30 minutes in your favorite sauce. A simple mix of soy sauce, garlic, and ginger can work wonders. When you’re ready to cook, crank up the heat in your pan. A hot skillet helps to sear the chicken quickly, keeping all those tasty juices inside. The result? Tender, flavorful chicken strips that pair wonderfully with rice or noodles.
Here’s a quick guide to help you on your way:
• Slice chicken into half-inch thick slabs for even cooking.
• Cut strips about one inch wide for the perfect bite.
• Marinate for at least 30 minutes to boost flavor.
• Cook at high heat for 5-7 minutes for juicy results.
With these tips, your stir-fries will not only taste great but also look fantastic. You’ll impress your family and friends with your cooking skills. Happy cooking!
11. Preparing Chicken for Cooking on the Grill

When grilling chicken, how you prepare it can make all the difference. Cutting the chicken breast not only helps it cook evenly but also allows flavors to penetrate the meat better. Imagine biting into a juicy, flavorful piece of chicken at your next barbecue—it’s all about the prep!
Start by slicing the chicken breasts into halves or quarters. This increases the surface area, which means faster cooking and more flavor. Then, marinate the pieces in a mix of your favorite spices and oils. Let them soak for at least 30 minutes. The longer you marinate, the more delicious your chicken will taste!
Now, let’s get grilling. Cook the marinated chicken over medium heat. This method ensures the meat stays juicy and tender, perfect for summer cookouts.
Here’s a quick recipe to try:
Ingredients:
– 2 chicken breasts
– 1/4 cup olive oil
– 2 tablespoons lemon juice
– 2 cloves garlic, minced
– 1 teaspoon salt
– 1 teaspoon black pepper
– 1 teaspoon paprika
– Fresh herbs (optional)
Instructions:
1. Cut the chicken breasts into halves or quarters.
2. In a bowl, mix olive oil, lemon juice, garlic, salt, pepper, and paprika.
3. Add the chicken pieces to the marinade and coat them well.
4. Cover and refrigerate for at least 30 minutes.
5. Preheat your grill to medium heat.
6. Grill the chicken for 6-8 minutes on each side, or until fully cooked.
7. Let it rest for a few minutes before serving.
This recipe not only gives you juicy, flavorful chicken but also makes grilling easy and enjoyable.
• Cut chicken into halves or quarters for even cooking.
• Marinate for at least 30 minutes to enhance flavor.
• Grill over medium heat for the best results.
• Let the chicken rest before cutting to keep it juicy.
12. Utilizing Chicken Breast for Salads

Imagine biting into a fresh salad topped with juicy, flavorful chicken breast. It’s a simple way to boost your meal’s protein and taste! Start by cooking your chicken breast—grilling or pan-searing works beautifully. Season it with your favorite spices while it’s cooking to amp up the flavor. Once it’s cooked, let it cool before slicing it into bite-sized pieces. This makes it easy to toss with greens and other salad ingredients.
Using leftover chicken is a fantastic way to save time. You can quickly assemble a satisfying lunch without much fuss. Think of it as a blank canvas; add colorful vegetables, nuts, or your favorite dressing to create a delicious meal.
Here’s a quick rundown to make your chicken salad experience delightful:
Cut chicken into bite-sized pieces for easy mixing.
Cook it first for maximum flavor.
Season while cooking for an extra flavor boost.
Use leftovers for a speedy, tasty meal.
Now, let’s get into a simple chicken salad recipe that you can whip up in no time!
Ingredients:
– 2 cooked chicken breasts, sliced
– 4 cups mixed greens (spinach, arugula, or romaine)
– 1 cup cherry tomatoes, halved
– 1/2 cucumber, sliced
– 1/4 cup red onion, thinly sliced
– 1/4 cup feta cheese (optional)
– Your favorite salad dressing (balsamic vinaigrette works well)
Instructions:
1. In a large bowl, add the mixed greens.
2. Top with sliced chicken, cherry tomatoes, cucumber, and red onion.
3. Sprinkle feta cheese on top if desired.
4. Drizzle your salad dressing over the ingredients.
5. Toss gently to combine and serve immediately.
This recipe is perfect for a quick lunch or dinner, and it offers endless possibilities for customization. You can swap in different veggies or dressings based on what you have on hand. Enjoy your fresh, vibrant chicken salad!
13. Storing Cut Chicken Breast Safely

Storing cut chicken breast properly is essential to keep it fresh and safe. You want to prevent spoilage and maintain the best quality for your meals. After cutting your chicken, place it in airtight containers and pop it in the fridge if you plan to use it within a couple of days. This way, it stays fresh and ready for your next dish.
If you need to store it longer, wrap the chicken tightly in plastic wrap or aluminum foil. Then, put it in the freezer. Freezing locks in flavor and keeps your chicken safe from freezer burn. Don’t forget to label your containers with the date so you can track how long it has been stored. Thaw your chicken in the refrigerator to keep its juicy texture and taste when you’re ready to cook.
Here are some quick tips to help you store your cut chicken effectively:
Use airtight containers for short-term storage.
Wrap tightly in plastic wrap for the freezer.
Label containers with dates for easy tracking.
Thaw in the refrigerator for the best quality.
Following these steps ensures your chicken stays delicious and safe to eat. By being mindful of how you store your chicken, you can enjoy flavorful meals without worry. Happy cooking!
14. Essential Knife Skills for Cutting Chicken

Cutting chicken breast can feel tricky, but mastering knife skills makes it easier and safer. You want to use a gentle slicing motion, not a heavy press. This technique helps you avoid tearing the meat and leads to clean, even cuts.
Start by holding the chicken firmly with one hand. This gives you better control while guiding the knife with your other hand. If you’re new to this, practice on vegetables first. It builds your confidence and sharpens your precision, making the transition to meat smoother.
Let’s break it down into some practical tips:
Use a sharp, high-quality knife. A good knife makes a big difference in how easily you can cut through the meat.
Practice your grip. Ensure your fingers are away from the blade as you guide the knife.
Cut against the grain. This means slicing in the opposite direction of the muscle fibers to ensure tenderness.
Keep your workspace clean and organized. This helps you focus and reduces the risk of accidents.
Remember, practice makes perfect. Take your time, and soon you’ll be cutting chicken like a pro! You’ll feel more confident in the kitchen, making meal prep faster and more enjoyable. Happy cooking!
Keep it gentle: use a light, slicing motion instead of pressing down hard. Hold the chicken steady and guide the knife with the other hand for clean, even cuts. If you’re new, practice on vegetables first to boost confidence with how to cut chicken breast.
15. Making Chicken Tender by Brining

Brining chicken breast is a fantastic way to make it juicy and full of flavor. When you soak the chicken in a simple mixture of water, salt, and sugar, something magical happens. The salt helps break down the proteins in the meat, making it tender and mouthwatering. Imagine biting into a perfectly cooked chicken breast that’s both juicy and flavorful! It’s a game changer for your meals.
To get started, mix together water, salt, and sugar in a bowl. A good ratio is about 1/4 cup of salt and 1/4 cup of sugar for every quart of water. Soak the chicken breasts in this brine for at least 30 minutes. If you have time, you can let them soak for up to 4 hours for an even better result.
After brining, rinse the chicken under cold water to remove excess salt. Then, pat it dry with paper towels. This step is crucial because it prevents too much moisture from affecting your cooking. Now you’re ready to cut and cook your chicken to perfection!
Here is a simple recipe for brined chicken breast:
Ingredients:
– 4 boneless, skinless chicken breasts
– 1 quart water
– 1/4 cup salt
– 1/4 cup sugar
– Optional: herbs like thyme or rosemary for extra flavor
Instructions:
1. In a large bowl, combine the water, salt, and sugar. Stir until dissolved.
2. Add herbs if you want to boost the flavor.
3. Place the chicken breasts in the brine, ensuring they are fully submerged.
4. Cover and refrigerate for at least 30 minutes, or up to 4 hours.
5. After brining, rinse the chicken under cold water.
6. Pat dry with paper towels before cutting or cooking.
By following these simple steps, you can enjoy tender, flavorful chicken in your meals. Brining is a straightforward technique that can elevate your cooking, making every bite delightful. Try it out and taste the difference!
16. Trimming Chicken Breasts for Perfect Presentation

Trimming chicken breasts is a simple yet vital step for a stunning presentation. When you take the time to remove excess fat, sinew, and jagged edges, your dish not only looks better but also tastes better. A clean-cut chicken breast creates a polished appearance that impresses guests, making it perfect for special occasions or family dinners. Imagine serving a beautifully plated dish, where the chicken looks as good as it tastes.
Start with a sharp knife or kitchen scissors to get the best results. For a professional finish, hold the breast steady on a cutting board. Carefully trim away any unwanted bits, keeping the meat intact. The result? A visually appealing dish that showcases your culinary skills. Plus, by eliminating those tough or greasy parts, you enhance the overall flavor of your meal.
Here’s how to get the best results:
• Use a sharp knife for clean cuts.
• Choose scissors for precise trimming.
• Remove all sinew and excess fat.
• Keep edges smooth for a polished look.
With these tips in mind, you can elevate your chicken dishes and impress anyone at your table. Not only will they look fantastic, but your careful preparation will also enhance the flavor and tenderness of your chicken. So, grab your tools and get ready to create a dish that’s as beautiful as it is delicious!
17. Cooking Chicken Breast to Perfection

Cooking chicken breast perfectly can turn a simple meal into a delightful experience. The key to juicy chicken is hitting the right internal temperature: 165°F (75°C). This ensures your chicken is safe to eat while keeping it moist and tender. To achieve this, a reliable meat thermometer is your best friend. It helps you avoid the common pitfall of overcooking, which can lead to dry, unappetizing meat.
When it comes to cooking methods, consider poaching, grilling, or baking. These techniques, when done right, can seal in moisture and flavor. For instance, poaching in seasoned water or broth allows the chicken to absorb delicious flavors while staying juicy. Grilling can give your chicken a nice char and smoky taste, perfect for summer meals.
After cooking, don’t forget to let your chicken rest for a few minutes. This simple step allows the juices to redistribute, making your chicken even more succulent when you slice it.
Here’s a quick summary to keep in mind:
Aim for an internal temperature of 165°F
Use a meat thermometer for accuracy
Choose poaching or grilling to retain moisture
Let it rest before slicing to keep it juicy
By following these tips, you’ll serve up chicken breast that’s not just safe to eat, but also bursting with flavor. Enjoy your delicious creation!
Recipe: Juicy Grilled Chicken Breast
Ingredients:
– 2 boneless, skinless chicken breasts
– 2 tablespoons olive oil
– 1 teaspoon garlic powder
– 1 teaspoon onion powder
– 1 teaspoon paprika
– Salt and pepper to taste
– Juice of 1 lemon
Instructions:
1. Prepare the marinade: In a bowl, mix olive oil, garlic powder, onion powder, paprika, salt, pepper, and lemon juice.
2. Marinate the chicken: Place chicken breasts in the marinade. Coat well and let them sit for at least 30 minutes (or up to 2 hours in the fridge for more flavor).
3. Preheat the grill: Heat your grill to medium-high.
4. Grill the chicken: Place the chicken on the grill. Cook for about 6-7 minutes on each side or until the internal temperature reaches 165°F.
5. Let it rest: Remove the chicken from the grill and let it rest for 5 minutes before slicing.
Enjoy your perfectly cooked chicken breast with your favorite sides!
18. Seasoning Techniques for Flavorful Cuts

Unlocking the secret to perfectly seasoned chicken breast cuts can turn your meal from ordinary to outstanding. You want your chicken to burst with flavor, right? Start with the basics: sprinkle a generous amount of salt and pepper on both sides. This simple step creates a solid foundation for any dish. Now, get creative! Think about adding herbs like rosemary or thyme, or spices such as paprika or garlic powder to jazz things up.
Let those seasonings work their magic. After you apply them, let your chicken rest for at least 30 minutes. This time lets the flavors seep into the meat, ensuring each bite is delicious. If you’re feeling adventurous, try marinating your chicken in a mixture of citrus juices or vinegar. These ingredients not only add zest but also help tenderize the meat, making it juicy and flavorful!
Here are some hands-on tips to elevate your chicken seasoning game:
Use salt and pepper as your flavor base.
Choose fresh herbs for a burst of color and taste.
Add citrus juices like lemon or lime for a tangy twist.
Let it sit for at least 30 minutes to deepen the flavor.
By following these simple steps, you’ll create chicken breast cuts that are not just safe to eat but also packed with flavor. This approach not only makes your meal more enjoyable but also impresses anyone who sits at your table.
Ready to make the best chicken of your life? Let’s get cooking!
Ingredients:
– 2 chicken breasts
– 1 tablespoon olive oil
– 1 teaspoon salt
– 1 teaspoon black pepper
– 1 teaspoon garlic powder
– 1 teaspoon paprika
– 1 tablespoon fresh rosemary or thyme (optional)
– Juice of 1 lemon or lime (optional)
Instructions:
1. Start by patting the chicken breasts dry with a paper towel.
2. In a small bowl, mix the salt, pepper, garlic powder, and paprika.
3. Rub the olive oil all over the chicken breasts.
4. Sprinkle the seasoning mixture evenly on both sides of the chicken.
5. If using, add the fresh herbs and drizzle the lemon or lime juice over the chicken.
6. Let the chicken sit for at least 30 minutes, or up to overnight in the fridge.
7. Cook the chicken using your preferred method: grilling, baking, or sautéing until fully cooked.
Enjoy your flavorful chicken breast, perfectly seasoned and ready to shine on your plate!
19. How to Shred Chicken Breast Efficiently

Shredding chicken breast is a game-changer for meal prep. It’s perfect for tacos, salads, or sandwiches. Once your chicken is cooked through, let it cool for about 10 minutes. This makes it easier to handle. Then grab two forks. With a simple pull-apart motion, you’ll create tender, fluffy shreds that are ready to elevate your meals.
Shredded chicken is super versatile. You can mix it into your favorite sauces for added flavor. Think BBQ sauce for sliders or a creamy dressing for salads. Not only does it taste great, but it also makes weeknight dinners a breeze. You can store your shredded chicken in an airtight container in the fridge for up to four days, ensuring you have a delicious protein ready whenever you need it.
Here’s how to do it right:
– Allow the chicken to cool slightly before shredding.
– Use two forks to pull the chicken apart gently.
– Store the shredded chicken in an airtight container for easy access.
– Add sauces or spices to enhance flavor and variety.
This method not only saves time but also opens doors to countless meal possibilities. Imagine a taco night where everyone can customize their own! Or a hearty salad topped with fresh, warm chicken. Enjoy the ease and taste of perfectly shredded chicken in your meals. You’ll wonder how you ever cooked without it!
20. Freezing Cut Chicken Breast for Future Use

Freezing cut chicken breast is a smart way to save time and prevent waste. It allows you to enjoy the convenience of pre-cut chicken whenever you need it. Imagine pulling out perfectly portioned chicken from your freezer for dinner, saving you precious time on busy weeknights. To do this effectively, place the chicken in high-quality freezer bags. Be sure to squeeze out as much air as possible to keep freezer burn at bay. Label each bag with the date you froze it, so you can easily keep track of freshness. Aim to use your frozen chicken within six months for the best taste and quality.
Here’s how to get started on freezing chicken the right way. First, cut your chicken breast into the sizes you typically use for recipes. After you have your portions ready, grab those freezer bags. If you want, you can even pre-season the chicken before freezing, making meal prep even easier. It’s budget-friendly too. You can buy chicken in bulk and freeze it in portions, which helps you save money and reduce food waste. This method ensures you always have chicken on hand, making meal planning so much smoother.
• Use quality freezer bags to prevent leaks and freezer burn.
• Label with dates to track freshness easily.
• Portion your chicken for quick meal preparations.
• Thaw safely in the refrigerator or use the microwave for quick defrosting.
Freezing cut chicken breast not only simplifies meal prep but also adds flexibility to your cooking routine. With a little planning, you can turn your freezer into a treasure chest of easy dinner options!
21. Making Chicken Stock from Leftovers

Don’t let those leftover chicken bits go to waste! Making your own chicken stock is a fantastic way to use bones, skin, and trimmings. Not only does it reduce waste, but it also adds incredible flavor to your dishes. Picture this: a warm, rich broth simmering on your stove, filling your kitchen with savory aromas. Plus, it’s easy and budget-friendly!
Start by collecting your chicken scraps in a large pot. Toss in any bones, skin, or leftover bits you have. Cover everything with cold water. Make sure to leave enough space for the water to bubble without overflowing. Bring it to a gentle boil and then lower the heat. Let it simmer for a few hours. This is where the magic happens! You can enhance the flavor by adding aromatics like chopped onions, carrots, celery, and fresh herbs like thyme or parsley.
Here’s a simple recipe to guide you:
Ingredients:
– Chicken bones and trimmings
– 1 onion, quartered
– 2 carrots, chopped
– 2 celery stalks, chopped
– 3-4 garlic cloves, smashed
– Fresh herbs (like thyme, parsley, or bay leaf)
– Salt and pepper to taste
– Water
Instructions:
1. Gather your chicken scraps and place them in a large pot.
2. Add the onion, carrots, celery, garlic, and herbs.
3. Pour in enough cold water to cover everything by about an inch.
4. Bring to a boil over medium-high heat.
5. Reduce to a simmer and cover, letting it cook for 3-4 hours.
6. Check occasionally, skimming off any foam that rises to the top.
7. Once done, strain the stock through a fine mesh sieve. Discard the solids.
8. Season with salt and pepper to taste.
Now you have a flavorful chicken stock to use in soups, sauces, or risottos!
Tips for Perfect Chicken Stock:
Use leftover rotisserie chicken bones for richer flavor.
Choose fresh vegetables for the best aroma.
Cool and store in jars for later use.
Freeze stock in ice cube trays for easy portions.
Making chicken stock is not just practical; it’s a great way to elevate your meals. You’ll impress your family and friends with homemade dishes that taste amazing. Enjoy the process, and happy cooking!
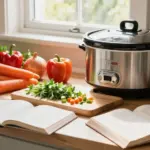
22. Cooking Chicken Breast in a Slow Cooker

Cooking chicken breast in a slow cooker is a lifesaver when you’re busy but still want a delicious meal. This method allows the chicken to soak up all the flavors from the broth or sauce you choose. Picture tender, juicy chicken that practically falls apart as you shred it with a fork. It’s not just about saving time; it’s about creating mouthwatering meals with minimal effort!
Start by cutting your chicken breasts into large chunks. This helps them cook evenly and absorb the flavors better. Next, add your favorite broth or sauce—this could be a savory chicken broth, zesty barbecue sauce, or even a creamy Alfredo. Set your slow cooker on low for several hours, and let it work its magic. The result? Perfectly cooked, shredded chicken that can be used in sandwiches, salads, or tacos.
Here’s how to make it happen:
Ingredients:
– 2-3 chicken breasts
– 1 cup of chicken broth or your favorite sauce
– Salt and pepper to taste
– Optional: herbs like thyme or rosemary for added flavor
Instructions:
1. Cut the chicken breasts into large chunks.
2. Place the chicken in the slow cooker.
3. Pour the chicken broth or sauce over the chicken.
4. Season with salt, pepper, and any herbs you like.
5. Cover and cook on low for 6-8 hours or until tender.
6. Shred the chicken with two forks and mix it with the sauce.
This slow cooker method is not only easy but also budget-friendly. You can use frozen chicken breasts and still enjoy a tasty meal. Plus, it frees up your time to focus on other tasks while dinner cooks itself. You’ll end up with a dish that feels comforting and satisfying, making it perfect for family dinners or meal prep for the week ahead.
• Cut chicken into large chunks for even cooking.
• Choose a flavorful broth or sauce to enhance taste.
• Cook on low for 6-8 hours for tender results.
• Shred and mix with sauce for delicious meals.
23. Cooking Chicken with a Sous Vide Method

Cooking chicken breast to perfection can be a challenge. But with the sous vide method, you can achieve juicy, flavorful results every time. This technique involves sealing your chicken in a vacuum bag with your favorite seasonings and then immersing it in a water bath. Set the temperature to your liking, and let it cook slowly. This method locks in moisture and flavor, ensuring your chicken never dries out. Once it’s done, give it a quick sear in a hot pan for a crispy exterior.
To get started, here’s what you’ll need: a vacuum sealer, bags, and a sous vide cooker. This method is not only efficient but also budget-friendly, as you can buy chicken in bulk and freeze portions for later. Plus, it’s perfect for meal prep! The sous vide method is gaining popularity for good reason—it simplifies cooking while elevating your meals to restaurant quality.
Here’s a simple way to sous vide chicken breast:
Ingredients:
– 2 boneless, skinless chicken breasts
– 1 tablespoon olive oil
– Salt and pepper to taste
– Your favorite herbs or spices (like garlic powder, rosemary, or paprika)
Instructions:
1. Season the chicken breasts with olive oil, salt, pepper, and your chosen herbs.
2. Place the chicken in a vacuum bag, ensuring it’s well-sealed.
3. Preheat your sous vide cooker to 140°F (60°C) for tender, juicy chicken or 160°F (71°C) for firmer texture.
4. Submerge the sealed bag in the water bath. Cook for 1 to 2 hours.
5. Once cooked, remove the chicken from the bag and pat it dry.
6. Heat a skillet over medium-high heat and sear the chicken for about 1-2 minutes on each side until golden brown.
Now you have a perfectly cooked chicken breast that’s moist and bursting with flavor. Enjoy it sliced on salads, in sandwiches, or paired with your favorite sides!
Cooking chicken with sous vide feels like cheating—in the best way. Juicy, evenly cooked meat every time, plus a quick sear for that crave-worthy crust. If you’re still wondering how to cut chicken breast, this technique makes it simpler.
24. Using Chicken Marinades for Flavor

Marinating chicken breast is a fantastic way to boost flavor and keep it juicy. Think of marinades as flavor bombs! You can make them using simple ingredients like olive oil, vinegar, fresh herbs, and your favorite spices. Just imagine biting into a tender, flavorful piece of chicken that’s soaked up all those delicious tastes. Letting your chicken marinate for at least 30 minutes is a good start, but if you can wait overnight, you’ll be rewarded with even richer flavors. This technique can turn a basic meal into a standout dish!
Ready to get started? Here’s how to make a delicious marinade:
1. Choose your base: Use olive oil or yogurt for richness.
2. Pick your acid: Include vinegar, lemon juice, or even wine to brighten up the flavor.
3. Add flavor: Toss in herbs like rosemary, thyme, or basil, along with spices such as garlic powder or paprika.
4. Combine: Mix everything in a bowl or a resealable bag, adding salt and pepper for extra taste.
Now, let’s talk about the practical side. Marinades can be budget-friendly! You don’t need fancy ingredients. Most items are likely in your pantry already. This simple step can elevate your chicken dishes, whether you’re grilling outside or baking in the oven. Plus, marinated chicken is perfect for meal prep, making weeknight dinners easy and delightful.
Here are some quick tips to marinate like a pro:
Use fresh herbs for a burst of flavor.
Choose a good balance of acid and fat for the best taste.
Pick a resealable bag for easy cleanup and even coating.
Add extras like honey or mustard for a unique twist.
With just a little time and creativity, you’ll transform ordinary chicken into a mouthwatering dish. Enjoy the process, and get ready to impress your family or guests with your tasty, marinated chicken!
25. Utilizing Leftover Chicken in Meal Prep

Using leftover chicken breast can be a game-changer for your meal prep routine. Not only does it save time, but it also helps you cut down on waste. Imagine grabbing a container of juicy, shredded chicken and whipping up a tasty stir-fry or a hearty salad in minutes! You can easily turn last night’s dinner into today’s lunch with just a little creativity.
Here are some practical tips to get the most out of your leftover chicken:
1. Shred or cube the chicken for easy mixing into dishes.
2. Add it to casseroles, giving them a protein boost and a delicious flavor.
3. Toss it into salads for a quick, nutritious meal.
4. Make sandwiches or wraps that are filling and full of flavor.
Storing your leftover chicken in portioned containers can really streamline your cooking process. Grab a few containers and fill them with prepped chicken. This way, you can easily access your leftovers when you’re in a rush. Plus, you can experiment with different flavors and combinations!
Want to try something new? How about a chicken quesadilla? Just take your leftover chicken, some cheese, and tortillas. Sauté them all together, and you’ll have a melty, cheesy meal in no time!
Recipe for Quick Chicken Quesadillas:
Ingredients:
– 2 cups shredded leftover chicken
– 1 cup shredded cheese (cheddar or your favorite)
– 4 flour tortillas
– 1 tablespoon olive oil
– Optional: diced peppers, onions, or spices like cumin
Instructions:
1. Heat olive oil in a skillet over medium heat.
2. Place one tortilla in the skillet.
3. Layer half of the tortilla with shredded chicken and cheese.
4. Add any optional ingredients you like.
5. Fold the tortilla over and cook for 3-4 minutes until golden brown.
6. Flip it carefully and cook the other side for another 3-4 minutes.
7. Remove from heat, slice, and enjoy!
Using leftovers not only saves money but also opens up a world of quick meal options. So, get creative and make the most of that leftover chicken!
26. The Role of Chicken in a Balanced Diet

Chicken breast isn’t just a meal; it’s a powerful ally in your journey to health. Packed with lean protein, it plays a crucial role in building muscle and keeping you energized. If you’re looking to manage your weight, adding chicken to your meals can help you feel full longer while providing essential nutrients. Think of vitamins B6 and B12 that support your metabolism, or selenium, which boosts your immune system. Pair chicken with colorful veggies and whole grains for a plate that not only looks great but also nourishes your body.
Making chicken a regular part of your diet is simple. Start by planning your meals around it. You can grill, bake, or stir-fry chicken to keep it interesting. Buy fresh vegetables and whole grains like brown rice or quinoa to create balanced meals. Aim for variety—try different herbs and spices to enhance flavor without extra calories.
Here’s how to get started:
Use
Add
Choose
Include
These simple swaps can transform your meals into health-packed delights. By making mindful choices, you’ll feel satisfied and energized, ready to tackle your day.
27. Cooking Chicken Breast in the Oven

Cooking chicken breast in the oven is one of the easiest and healthiest ways to prepare this delicious protein. When you bake chicken, it stays juicy and flavorful, making it a perfect choice for a weeknight dinner. Plus, it’s a breeze to clean up! Imagine walking into your kitchen and being greeted by the mouthwatering aroma of seasoned chicken wafting through the air.
To get started, preheat your oven to 375°F (190°C). While that’s heating up, season your chicken breast with your favorite spices. A simple mix of salt, pepper, and garlic powder works wonders. If you’re feeling adventurous, try adding paprika or Italian herbs for extra flavor. Once seasoned, place the chicken on a baking sheet lined with parchment paper for easy cleanup. Bake for about 20 to 30 minutes, or until the chicken reaches an internal temperature of 165°F (75°C). This method not only locks in moisture but also gives you the freedom to pair it with various side dishes for a fulfilling meal.
Here’s a quick recipe to guide you:
Ingredients:
– 2 boneless, skinless chicken breasts
– 1 tablespoon olive oil
– 1 teaspoon salt
– 1/2 teaspoon black pepper
– 1 teaspoon garlic powder
– Optional: 1 teaspoon paprika or Italian seasoning
Instructions:
1. Preheat your oven to 375°F (190°C).
2. Pat the chicken breasts dry with a paper towel.
3. Drizzle olive oil over the chicken and rub it in.
4. Sprinkle salt, pepper, garlic powder, and any optional seasonings evenly over both sides.
5. Place the chicken on a lined baking sheet.
6. Bake for 20-30 minutes, or until the chicken is cooked through.
7. Let it rest for a few minutes before slicing and serving.
This baked chicken is perfect alongside roasted vegetables, a fresh salad, or even a side of quinoa. You can also shred the chicken to use it in tacos or salads.
Here are some tips to make your meal even better:
– Choose fresh herbs to enhance flavor.
– Add lemon juice before serving for a zesty kick.
– Pair with a side of steamed broccoli or mixed greens for a healthy balance.
– Store leftovers in an airtight container for quick meals later.
Enjoy your hearty and healthy oven-baked chicken breast that’s not only tasty but also incredibly easy to prepare!
28. Experimenting with Chicken Cut Recipes

Don’t hesitate to get creative with your chicken cut recipes! Chicken breast is incredibly versatile and can fit into countless dishes. Think of stir-fries bursting with colorful veggies or a comforting casserole that warms the soul. You can even explore flavors from around the globe, like sweet teriyaki or spicy curry. Trying new recipes not only delights your taste buds but also keeps mealtime fun and adventurous.
Ready to dive in? Start by selecting a few international recipes that catch your eye. You can find countless options online or in cookbooks. Look for budget-friendly ingredients to keep costs low. Think about combining fresh herbs or spices that excite your palate. This way, you’ll create dishes that are not only delicious but also healthy. Plus, experimenting in the kitchen can be a great way to bond with family or friends.
Here are some ideas to spark your culinary creativity:
Mix flavors: Combine garlic and ginger for a zesty stir-fry.
Add textures: Include crunchy veggies like bell peppers or carrots.
Choose marinades: Try yogurt with spices for a tenderizing marinade.
Serve globally: Pair your chicken with rice, tortillas, or noodles.
With a little imagination, you can turn simple chicken into a world of flavors. So, roll up your sleeves and get cooking! Your next favorite dish is waiting to be discovered.
29. Enhancing Your Chicken Cooking Skills

To really boost your chicken cooking skills, you need to practice and explore. Trying out new techniques can open up a world of delicious possibilities. Think about joining a cooking class or diving into online tutorials. Watching experts in action can build your kitchen confidence and inspire you to try bold flavors and methods. Before long, cooking chicken breast will feel like second nature, and your meals will truly impress!
Start with simple recipes that catch your eye. Don’t be afraid to experiment! If you love garlic, try a garlic herb marinade. If spice is your thing, play around with chili powders. Each new recipe is a chance to learn. Think of it as a fun challenge rather than a chore.
Here are some practical tips to take your skills to the next level:
Practice regularly to build your confidence and speed.
Try new techniques like brining for juicier chicken.
Watch online tutorials for hands-on learning from experts.
Join a cooking class for personalized guidance and tips.
Each step you take makes cooking more enjoyable and fulfilling. Embrace the process. With every meal, you’re not just cooking chicken; you’re creating memories and flavors that your family and friends will cherish. Happy cooking!
Conclusion

Cutting chicken breast may seem daunting, but with these 29 techniques, you’ll feel like a pro in no time.
From selecting the right knife to mastering cooking methods, each step enhances your meal prep experience.
So grab your cutting board and knife, and let’s make delicious, healthy meals together!
Frequently Asked Questions
What Are the Best Techniques for Cutting Chicken Breast Evenly?
Cutting chicken breast evenly is crucial for consistent cooking. Start by placing the chicken breast on a cutting board and using a sharp knife. Consider cutting it in half horizontally if it’s thick, then slice it into even pieces about 1-inch wide. This way, your chicken breast cutting techniques will ensure that each piece cooks evenly, making it perfect for your meal prep needs!
How Can I Ensure Safe Chicken Preparation During Cutting?
Safety first! To ensure safe chicken preparation, always wash your hands before and after handling raw chicken. Use a separate cutting board for poultry to avoid cross-contamination. Keep your workspace clean, and be sure to use a sharp knife for precise cuts. This not only enhances your knife skills for chicken but also reduces the risk of accidents in the kitchen.
What Should I Do If My Chicken Breast is Too Slippery to Cut?
If your chicken breast feels slippery, it can be challenging to cut. Try placing it in the freezer for about 15-20 minutes to firm it up, making it easier to handle. Additionally, using a paper towel to grip the chicken can help with stability. Remember, proper handling is part of safe chicken preparation, which is vital for your cooking safety!
Are There Specific Knives Recommended for Cutting Chicken Breast?
Absolutely! A sharp chef’s knife or a boning knife is ideal for cutting chicken breast. The sharp blade allows for clean cuts, which is essential for even cooking. A sturdy cutting board helps too! Investing in good quality knife skills for chicken can make your meal prep not only easier but also more enjoyable.
What Are Some Cooking Chicken Tips After Cutting Chicken Breast?
Once you’ve cut your chicken breast, there are several cooking chicken tips to keep in mind! Marinating the pieces can add flavor and moisture. Cook them in a preheated skillet or grill for better searing. Using a meat thermometer to check for doneness (165°F or 75°C) is a great way to ensure your chicken is safe to eat while remaining juicy. Happy cooking!
Related Topics
chicken breast cutting
safe chicken preparation
knife skills
meal prep
cooking techniques
easy recipes
beginner friendly
healthy cooking
poultry cutting guide
cooking tips
kitchen safety
even cuts